The Chickens are Coming Home to Roost

And we almost have a home for them.

Nate has been working so hard, giving up several weekends in a row, to get this coop and run completed, and it is really finally coming together. Especially since this is what it looked like three weeks ago.ImageChickens are simple creatures, but they probably wouldn’t be happy scratching the concrete floor of our garage for worms or bending their little chicken knees (homonymically speaking, this is also the language chickens speak: Chickenese) and jumping up to get out the pop hole, let alone sharing their space with so many power tools. So we made them this._DSC0477
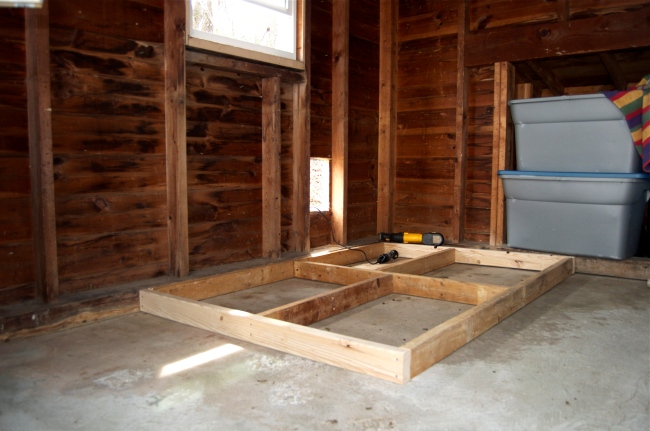
This is our poultry palace. OK, so it’s a plywood palace, but it’s both ecologically and economically constructed, and it meets our strict city ordinance for backyard chickens…I think. We have yet to receive our permit from the city, which costs $25 and expires annually. It also requires a photo of the coop and a plan of the run. They don’t mess around. Permit or not, the coop already has covered some of the common mistakes of first-time flock tenders, like external access to the nest boxes for ease of egg collection. No poop on our boots! We got the material for the nest boxes, the door, and the window (this one here being modeled by the handsome carpenter himself)_DSC0454


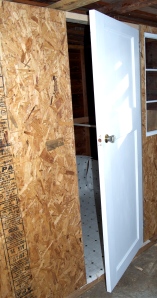
from my mother’s basement. Nate sanded, painted, and fitted them. We also got some of the lumber reclaimed, but the flooring, walls, and roost are new materials. Here’s a peek inside. You can see the roost, which for now is a wide dowel, but come winter may be changed out for a 2×4, and the easy-to-clean linoleum floor._DSC0478Nate still has to build the ramp for the pop hole, as well as install the predator-proof sliding door for it, but we have supplies!_DSC0466 _DSC0467
The pine shavings are for the floor of the coop and nest boxes, and we’ll be getting a bale of hay as well, to be shared with the run. Our little eight-weekers are currently being fed chick starter crumbles and being introduced to grower crumbles, which is what I bought for them. They will stay on the grower crumbles for another few weeks until they’re big enough to swallow grower pellets. Then, at 18 weeks, we can move them on to layer pellets in preparation for eggs! They will also be dining on compost pile fare, yard foraging, and occasionally oyster shells. I ordered a hanging metal water fountain with a pitched roof to discourage roosting and two feeders, a metal one for the corner of the run and a plastic, suspended one with sections to discourage scratching and pooping in it for the coop. Apparently you can also purchase toys for your chickens, like a hanging ball with holes filled with greens, so they can play lettuce tether ball, I guess.

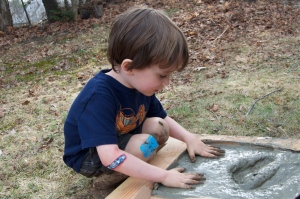
Finally, Nate recruited friends to help him with the run, which looked like this for a good long while._DSC0436This is mostly because his first assistant ended up doing this instead of pouring concrete like he was supposed to. It’s so hard to find good help these days._DSC0448After a lot of concrete, digging pernicious tree roots out of trenches, framing, roofing, and wire stapling, the run is about half finished. I will save more recent photos for the final product, chickens included. _DSC0482We pick up our hens on May 10th, so Nate will sacrifice one more weekend to this project, which has been educational, laborious, fun, and mostly, anticipatory. We are so excited to meet our little feathered females. They already have names. But, you’ll have to wait to hear those too.



Sauerkraut: Raw, Fermented Deliciousness for your Gut

I made my first batch of homemade sauerkraut over the past month. We had it today with lunch, and it was awesome. This is how I made it. _DSC0430   These are the things I used:

_DSC0385

  • One-gallon ceramic fermenting crock
  • Large stock pot
  • A potato masher
  • A heavy bowl (or weight stone if you have it)
  • Knife
  • Cutting board
  • Food processor with grating blade (alternatively, carrots can be grated manually)
  • Sea salt
  • Two heads green cabbage (about four pounds)
  • Eight carrots (about one pound)
  • Dish towel held down with an elastic band (or similar porous cover if your crock doesn’t have a lid)


This is what I did to the things I used:

  • Peel off outer layer of cabbage and slice in half. I chose to use as much of the stem as possible, but you can cut it out entirely. Slice the cabbage in thin, even strips.Image
  • Peel the carrots and slice off the ends. I used a mixture of orange and purple carrots because they were so darned pretty.  Fit the food processor with the grating blade, then add the carrots. Combine grated carrots with the sliced cabbage in a large stock pot._DSC0387
  • Add three tablespoons of sea salt to the vegetables. You can also used kosher salt. I used salt right from the Maine ocean. Buy local!
  • Now massage the mixture with your bare hands. That’s right. Stick your hands in there and start grabbing handfuls of the stuff and squeezing it between your fingers to work the salt in and start breaking down the cell walls of the vegetables to release water. Squeeze, press, grind, wring, and mash the cabbage and carrot for, like, ever.
  • Give up and start using a potato masher. You are supposed to work the mixture until there is a lot of brine and it is reduced by half. After ten minutes of using my hands, the veggies still weren’t below water, so I started using a tool. There’s actually something called a Sauerkraut Stomper, which looks like a wooden pestle, but I found that a potato masher allowed the water to seep up and around the vegetables better. I did all this in a stock pot because my fermenting crock didn’t allow me to maneuver very well either with my hands or with the potato masher.
  • Once well combined and starting to get limp and briny, transfer the mixture to the fermenting crock. There are a lot of fermenting crocks out there, many of them larger than mine with lids, but they cost between $100-$130. Mine was $19.99.

_DSC0391


  • The vegetables should be covered with at least an inch of brine. Mine weren’t, but after I added weight they sunk below the water. If yours still aren’t well covered in brine after you add weight, you can add salt water._DSC0392
  • Cover the crock with a lid or a porous cover. I used a dish towel secured with a rubber band so the mixture could breathe. In order for the good bacteria to grow, you want some air to penetrate, but not grow mold or mildew. Keeping the mixture below the brine will prevent this while allowing the good bacteria to thrive. Because Wikipedia can say it better than I can, check out the chemistry of fermentation._DSC0393
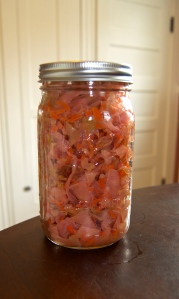
  • Ideally, you want to keep the sauerkraut at about room temperature (68°-70°) in a dim place. I let this batch stand for an entire month, writing the date on the dish towel. Some sites say the sauerkraut is done in 2-3 weeks, but I checked this batch, and it didn’t have that telltale fermenting smell, so I let it keep going. As long as you don’t smell or see mold, it should be fine. And, with any luck, it will taste delicious and look like this._DSC0431

Sugaring: Part III (Epilogue)

Image

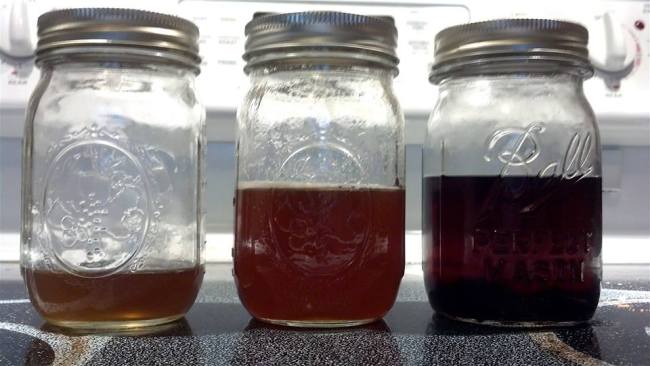
Our first maple syrup season has come to an end. The sap buckets remained dry for two days in 50° daily temps, so it seemed time to remove the taps. We tapped a grand total of two trees and gathered about fifteen gallons of sap. We made a lot of rookie mistakes. We will never be selling our liquid gold. But damn if we didn’t have some amazing pancake breakfasts.

The first time I boiled the sap from our sugar maple tree I only had about a gallon to start with, and I boiled it on the stove top on high for about an hour, while yielded a negligible, but delicious, amount of maple taffy.

The second time I boiled about four gallons of sap from the sugar maple and made a very thin, but no less delicious, maple-flavored water. I proudly announced on Facebook that I had made our first pint of “Fancy U.S. Grade A Light Amber” maple syrup! Well, I did … sort of … It was 75-percent translucent with a mild maple flavor, which got immediately sponged up by our pancakes and disappeared.

The third time I boiled sap from both our sugar maple and our silver maple. In order of deliciousness, the sap from a silver maple holds down the fourth spot after sugar, red, and black maple trees. Sugaring professionals are cringing in their Bean boots right now. However, combined with the sap from the sugar maple I had about three gallons of sap, and I was wiser. I boiled the sap on medium heat for about four hours and produced “U.S. Grade A Dark Amber” syrup that was 60.4-percent translucent. OK, not really. It was still rather thin, but this incredibly rich, dark amber that tasted amazing before it got sponged up by our pancakes.

Finally, the last time I boiled sap, it was the height of sugaring season and I had about six gallons of sap between the two trees. Instead of boiling in the stock pot, I used a 24-gauge, stainless steel steam table pan across the front and bridge burners of our stove top.

Steam table pan

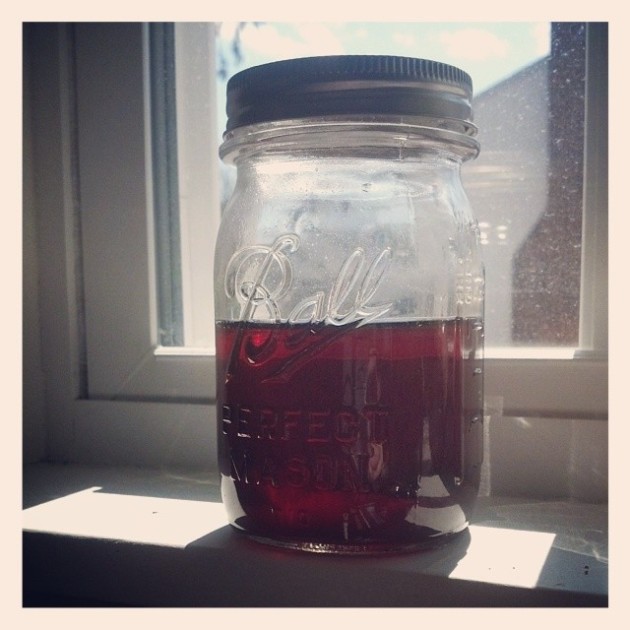
I boiled it slowly. I boiled it forever. I caressed this sap. I made love to it. And it worked. I produced the thickest, most delicious half a pint of medium-amber syrup yet. It was so good I gave some away. I was so proud of this syrup, I didn’t hoard it all for my immediate family. I spread the syrup love.

Image

And that is what maple syrup is supposed to look and taste like. It only took four tries.

Seedlings and Signs of Spring

Last week Alistair and I started volunteering at Winslow Farm, just up the road from us. It’s an organic farm with a farm stand, a cut-flower business, medicinal herb garden, and delicious organic vegetables—most of which are growing merrily inside their greenhouses at the moment. Max, the farmer, was the only local farmer willing to allow such little hands to help out on his farm, and we are grateful for the experience. For our first day, Max had us weeding the beet and mustard green beds. This took two solid hours. Of course, after fifteen minutes, Alistair decided breaking up clods of dirt was much more worthy of his time, but I found the weeding very meditative and simple. I enjoyed it immensely. And so, when I saw the seedlings at Winslow, mostly planted three or four weeks ago, I realized we had better get a move on, despite the still-frozen ground.

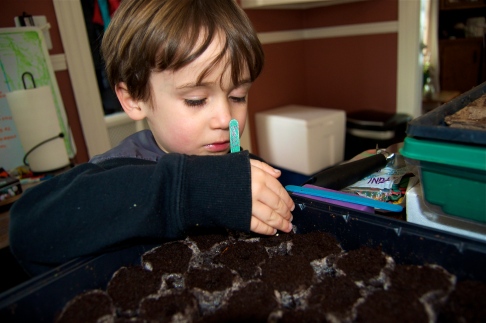
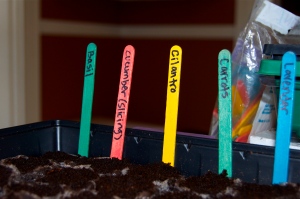
My mom bought us a seed-starter tray complete with soil, so Alistair and I had fun poking one or two of each seed into the little soil nests and labeling each row.Image

In case some don’t germinate well, I planted four or five of each plant, including carrots, cucumbers (pickling and slicing), beets, cilantro, basil, and lavender. We plan to keep these seedlings inside until the ground warms in a few weeks, although according to the Farmers’ Almanac the last frost won’t be until the first week in May this year. At least we are replanting these guys in raised beds and not in the ground, so they should be OK outside by the end of April.

_DSC0422

Some of these seeds don’t strictly need to be started inside because they grow just fine from seed, like basil, but we have a lot of seeds and a lot of room for experimentation. So far the beets, cucumbers, and carrots are going like gangbusters.

IMG_20140403_123620_462It’s still pretty chilly for April, but I opened the windows today to let some fresh air into the house. There’s been some rain, and the snow is slowly receding to the periphery, so our first crocuses have popped out in the herb garden! Since this is our first spring at the new house, everything is a surprise. Our crocuses are purple, yellow, and white, and they’re in varying stages of blossom, along with the oregano and chives. I can’t wait to see what else pops up.

IMG_20140403_114206

This is the true embodiment of spring: new life, renewal, air, water, earth. Even though the winter was long and cold, I knew when we moved back here that because we endured winter, we would have a better appreciation for the changing seasons and for the miracle of spring, even if it takes its time. I am grateful for it all. And I am also grateful for ducks. These are our new neighbors, Mr. and Mrs. Mallard, the nesting pair who have moved into the puddle in our side yard. Welcome, friends. Are you enjoying spring? Ready to get it on? I thought so.

IMG_20140405_103941_732